Playing the Course
|
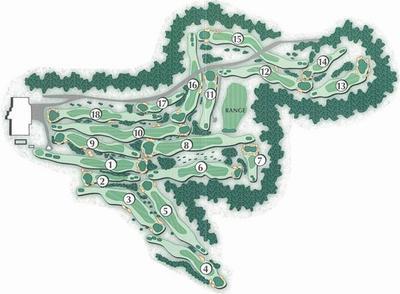
Click on the hole number to view specific hole information. |
||||||||||||||||||||||||||||||||||||||||
|
|
|||||||||||||||||||||||||||||||||||||||
|
||||||||||||||||||||||||||||||||||||||||
Golf Course
Hole: 1
| Tees | Yardage | Par | H/C | |
| Blue | 458 | 5 | 3 | |
| White | 446 | 5 | 3 | |
| Gold (M) | 376 | 5 | 3 | |
| Gold (W) | 376 | 5 | 7 | |
| Red | 297 | 5 | 7 | |
| Orange | 301 | 5 | 7 |
How to Play It
A short and straightaway par 5 with a downhill tee shot and an uphill approach shot to a well bunkered green. An ideal drive is down the left hand side leaving an option to go for the green or lay-up for a wedge shot. The approach shot plays a little longer because it is uphill and the green slopes from back to front. Be precise on your approach shot since there are four bunkers surrounding the green and over the green will test your pitching ability. Choose your approach shot wisely and a birdie is possible.
Hole: 2
| Tees | Yardage | Par | H/C | |
| Blue | 202 | 3 | 17 | |
| White | 179 | 3 | 17 | |
| Gold (M) | 166 | 3 | 17 | |
| Gold (W) | 166 | 3 | 15 | |
| Red | 164 | 3 | 13 | |
| Orange | 164 | 3 | 15 |
How to Play It
A medium length downhill par three to a well bunkered green. This hole plays one club shorter than the yardage indicates and the green slopes from right to left. An ideal tee shot is on the green or short in front of the green. Miss the green left, right, or long and a bogey or worse is a definite possibility. A par is a good score here.
Hole: 3
| Tees | Yardage | Par | H/C | |
| Blue | 396 | 4 | 1 | |
| White | 389 | 4 | 1 | |
| Gold (M) | 364 | 4 | 1 | |
| Gold (W) | 364 | 4 | 3 | |
| Red | 360 | 4 | 5 | |
| Orange | 275 | 4 | 3 |
How to Play It
A long to medium length dogleg right par four with an uphill blind tee shot and a fairway that slopes from left to right. Aim your tee shot at the lone pine tree and let the natural contour of the fairway keep your ball in the fairway. Depending on the length of your drive, your approach shot will range from a short to long iron to a green that slopes from left to right and front to back. Favor the front left side of the green on your approach shot, avoid the two front bunkers, and avoid going over the green since going over the green will result in a bogey or worse. A par is a good score here.
Hole: 4
| Tees | Yardage | Par | H/C | |
| Blue | 331 | 4 | 11 | |
| White | 306 | 4 | 11 | |
| Gold (M) | 260 | 4 | 11 | |
| Gold (W) | 260 | 4 | 13 | |
| Red | 256 | 4 | 11 | |
| Orange | 256 | 4 | 13 |
How to Play It
A short uphill dogleg right par four with out of bounds right and a forced carry of 175 yards to reach the fairway. Aim your tee shot at the left fairway bunker and fade it into the fairway. This will leave a medium iron to a wedge into a green that slopes slightly from back to front with a bunker left and right. Play your tee shot correctly and a birdie is a definite possibility.
Hole: 5
| Tees | Yardage | Par | H/C | |
| Blue | 412 | 4 | 13 | |
| White | 390 | 4 | 13 | |
| Gold (M) | 341 | 4 | 13 | |
| Gold (W) | 341 | 4 | 9 | |
| Red | 338 | 4 | 7 | |
| Orange | 338 | 4 | 9 |
How to Play It
A long straightaway par four with a fairway sloping from left to right and an uphill approach shot to a green that slopes from right to left and back to front. Favor the left side of the fairway on your drive due to the contour of the fairway and also avoid the pine trees to the left of the fairway which will result in a bogey or worse. A good drive will leave a long to medium iron to a green that is fronted by a bunker short left and short right. Keep your approach below and left of the pin and be happy to two-putt. A par is a good score here.
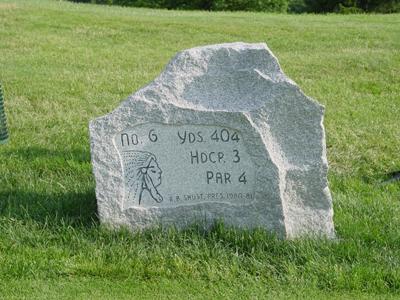
Hole: 6
| Tees | Yardage | Par | H/C | |
| Blue | 426 | 4 | 7 | |
| White | 409 | 4 | 7 | |
| Gold (M) | 343 | 4 | 7 | |
| Gold (W) | 343 | 4 | 1 | |
| Red | 338 | 4 | 3 | |
| Orange | 338 | 4 | 1 |
How to Play It
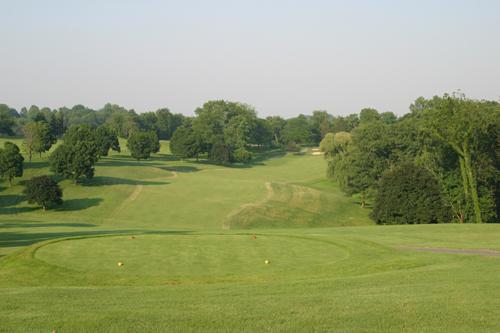
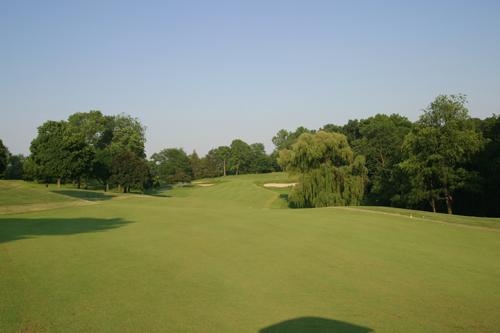
A long downhill slight dogleg right par four with an uphill approach shot to a green that is unusual by its design. The approach shot is uphill to a green that is a "bowl shape" with a back stop and slopes severely from back to front. A good drive down the left side will leave a long to mid iron approach shot. A extra club can be used for your approach shot due to the backstop green. Use an extra club and let the contour of the green bring your ball back to the pin. Avoid the willow tree to the right of the fairway and the front right bunker or a bogey or worse is in the equation. A par is a good score here.
Hole: 7
| Tees | Yardage | Par | H/C | |
| Blue | 142 | 3 | 15 | |
| White | 134 | 3 | 15 | |
| Gold (M) | 115 | 3 | 15 | |
| Gold (W) | 115 | 3 | 17 | |
| Red | 111 | 3 | 17 | |
| Orange | 111 | 3 | 17 |
How to Play It
A short par three to a well bunkered green with a green that slopes from back to front and has two tiers (1 left and 1 right). A short to mid iron is the play and your tee shot must find the putting surface. Avoid the bunkers, be below the hole and a birdie or a par is a possibility. Short side yourself in one of the five bunkers and you are looking at a bogey or worse.
Hole: 8
| Tees | Yardage | Par | H/C | |
| Blue | 429 | 4 | 9 | |
| White | 416 | 4 | 9 | |
| Gold (M) | 404 | 4 | 9 | |
| Gold (W) | 404 | 4 | 11 | |
| Red | 400 | 4 | 1 | |
| Orange | 400 | 5 | 11 |
How to Play It
A long straightaway par four with a fairway sloping from right to left and a green sloping from back to front. The hole is benign in the fact that there aren't any tricks to play this hole, just a length of 416 yards. A good drive down the right side will leave a fairway wood to long iron slightly uphill approach shot. Avoid the trees left, reach the putting surface in two, two putt for par and go to number nine is ideal for this hole.
Hole: 9
| Tees | Yardage | Par | H/C | |
| Blue | 390 | 4 | 5 | |
| White | 379 | 4 | 5 | |
| Gold (M) | 366 | 4 | 5 | |
| Gold (W) | 366 | 4 | 5 | |
| Red | 363 | 4 | 9 | |
| Orange | 363 | 4 | 5 |
How to Play It
A medium length straightaway par four with a slightly downhill tee shot and slightly uphill approach shot. The green has two tiers and slopes slightly from back to front. This hole is a tight driving hole and a good drive down the right side will leave a medium to short iron approach shot. Avoid the two fairway bunkers and the trees lining both sides of the fairway to leave your best approach shot. Make sure you have enough club on your approach shot because short of the green will be a difficult par. A par is a good score here.
Hole: 10
| Tees | Yardage | Par | H/C | |
| Blue | 560 | 5 | 6 | |
| White | 552 | 5 | 6 | |
| Gold (M) | 540 | 5 | 6 | |
| Gold (W) | 540 | 5 | 6 | |
| Red | 536 | 5 | 2 | |
| Orange | 536 | 5 | 2 |
How to Play It
A long par five with an uphill tee shot to a tree-lined fairway on your drive. Aim you tee shot down the right side of the fairway which will leave an ideal place for your second shot. Avoid the fairway bunkers on the left side on your second shot to leave a short to middle iron approach shot to a green that slopes severely from back to front with a bunker short right and left. Keep you approach shot short of the pin and a par or birdie is a definite possibility.
Hole: 11
| Tees | Yardage | Par | H/C | |
| Blue | 227 | 3 | 16 | |
| White | 220 | 3 | 16 | |
| Gold (M) | 217 | 3 | 16 | |
| Gold (W) | 217 | 4 | 18 | |
| Red | 214 | 4 | 18 | |
| Orange | 214 | 4 | 18 |
How to Play It
A long par three to a green that slopes from back to front with a bunker on the left and the right. Club selection here ranges from a driver to a long iron. On or short of the green is an ideal place to make par and you will be taking your chances anywhere else. A par is a good score here.
Hole: 12
| Tees | Yardage | Par | H/C | |
| Blue | 496 | 5 | 2 | |
| White | 487 | 5 | 2 | |
| Gold (M) | 436 | 5 | 2 | |
| Gold (W) | 436 | 5 | 8 | |
| Red | 425 | 5 | 8 | |
| Orange | 406 | 5 | 8 |
How to Play It
A short to medium length par five that is a slight dogleg to the right with a fairway sloping slightly from left to right. Aim your tee shot at the fairway bunker on the left and let the contour of the fairway bring the ball to the middle. There is out-of-bounds down the entire right side of this fairway and the fairway and rough slopes towards the out-of-bounds. Avoid the out-of-bounds and a decision needs to be made for your second shot: lay-up short of the gulley and leave yourself an approach of about 165 yards or try to hit over the gulley which leaves an approach shot under 75 yards. Hitting the green in two is also an option for the longer hitter. You must be precise on your approach shot because the green has multiple elevations / undulations. Hit your approach shot to the right section of the green on your second or third shot and a birdie is a possibility.
Hole: 13
| Tees | Yardage | Par | H/C | |
| Blue | 281 | 4 | 12 | |
| White | 265 | 4 | 12 | |
| Gold (M) | 238 | 4 | 12 | |
| Gold (W) | 238 | 4 | 14 | |
| Red | 233 | 4 | 14 | |
| Orange | 233 | 4 | 14 |
How to Play It
A short uphill par four with a blind tee shot to a well protected green. Aim your tee shot left of the fairway bunker or at the second pine tree from the right behind where the green is. A longer hitter is capable of driving the green but the drive must be precise since there are five bunkers surrounding this green. A drive down the right side will leave a wedge or short iron to a flat narrow green. If the hole is played correctly, a birdie is a possibility.
Hole: 14
| Tees | Yardage | Par | H/C | |
| Blue | 165 | 3 | 14 | |
| White | 155 | 3 | 14 | |
| Gold (M) | 137 | 3 | 14 | |
| Gold (W) | 137 | 3 | 16 | |
| Red | 133 | 3 | 16 | |
| Orange | 133 | 3 | 16 |
How to Play It
A mid to short slightly downhill par three to a well bunkered green that slopes slightly from left to right and front to back. Be precise with your tee shot to avoid the five bunkers surrounding the green. This hole plays about a half of a club to a full club shorter than the yardage indicates because it is slightly downhill. The prevailing wind on this hole is from right to left and can not be felt from the protected tee. Play your tee shot to the middle of the green and a birdie is a possibility, but par is a good score here.
Hole: 15
| Tees | Yardage | Par | H/C | |
| Blue | 552 | 5 | 4 | |
| White | 535 | 5 | 4 | |
| Gold (M) | 432 | 5 | 4 | |
| Gold (W) | 432 | 5 | 4 | |
| Red | 427 | 5 | 4 | |
| Orange | 427 | 5 | 4 |
How to Play It
A long uphill par five with a blind tee shot and blind second shot. Aim you tee shot at the end of the cart path and hit it solid to reach the top of the hill. Aim your second shot 20 yards right of the pine trees on the left to avoid the fairway bunker on the right about 100 yards from the green. This will leave your best approach shot to the green. Two well played shots will leave a downhill shot with a short to medium iron to a well bunkered green. Hit your approach shot on the green, which is relatively flat, or short to leave your best shot at a par. Local knowledge is a must here or a bogey or worse is in the equation.
Hole: 16
| Tees | Yardage | Par | H/C | |
| Blue | 357 | 4 | 10 | |
| White | 334 | 4 | 10 | |
| Gold (M) | 281 | 4 | 10 | |
| Gold (W) | 281 | 4 | 10 | |
| Red | 275 | 4 | 10 | |
| Orange | 262 | 4 | 10 |
How to Play It
A short dogleg right par four to a narrow green that slopes from front to back and left to right. Aim your drive at the two fairway bunkers on the left side of the fairway which are 230 yards from the tee which will leave a short to medium iron into the green. Avoid the right front fairway bunker and hit this narrow green with your approach shot and a birdie is a possibility.
Hole: 17
| Tees | Yardage | Par | H/C | |
| Blue | 187 | 3 | 18 | |
| White | 175 | 3 | 18 | |
| Gold (M) | 153 | 3 | 18 | |
| Gold (W) | 153 | 3 | 12 | |
| Red | 150 | 3 | 12 | |
| Orange | 150 | 3 | 12 |
How to Play It
Shannopin's signature hole which is a medium to long downhill par three with a small double green. Club selection ranges from five different clubs depending on the wind and the pin placement on the green that is 42 yards in length. The green is well bunkered with two bunkers right and left. What makes this hole unique is the double green which is shaped diagonally from left to right. Accuracy is a premium on this hole because balls missing the green find a second shot in a bunker or an uneven lie around the green that likely will result in a bogey or worse. There is also out-of bounds that is in play on the right side and balls missing the green right are likely to end up out-of-bounds. The late great Gene Sarazen once said that the ideal way to play this hole is to aim at the front green and take your chances on a two putt. A par is a very good score and a bogey is acceptable on this tough hole.
Hole: 18
| Tees | Yardage | Par | H/C | |
| Blue | 439 | 4 | 8 | |
| White | 372 | 4 | 8 | |
| Gold (M) | 335 | 4 | 8 | |
| Gold (W) | 335 | 4 | 6 | |
| Red | 330 | 4 | 6 | |
| Orange | 330 | 4 | 6 |
How to Play It
A medium to long uphill par four finishing hole to a very narrow fairway and a two tiered green. You must avoid the two fairway bunkers on the left side of the fairway to set-up a long to medium iron approach shot. Aim your tee shot at the middle of the two peaks on the clubhouse and you drive will be in the middle of the fairway. Your drive is half the battle since your approach shot is slightly uphill to an undulating green with two fairway bunkers short right and short left and out-of-bounds only a couple of yards off the right side of the green. Hit your approach shot to the middle of the green and two putt for a par and you will be ahead of your playing opponents. A very strong finishing hole that compliments a very strong 17th hole.


